Secure your company website without losing rank or traffic
The goals:
- Make your website secure
- Improve the way Google perceives your website
- Don’t lose ranking in Google
- Don’t lose money or traffic
Most HTTPS guides don’t take into consideration the SEO budget, sweat and tears that have gone into websites.
We don’t simply want to make our website secure, we want to make our website perform better in Google. We don’t want to mess anything up in Google, and we don’t want to lose money.
The actual technical act of switching to HTTPS is a small fragment of what is required to safely and successfully secure your website without losing rank or traffic.
What does a successful HTTPS migration look like?
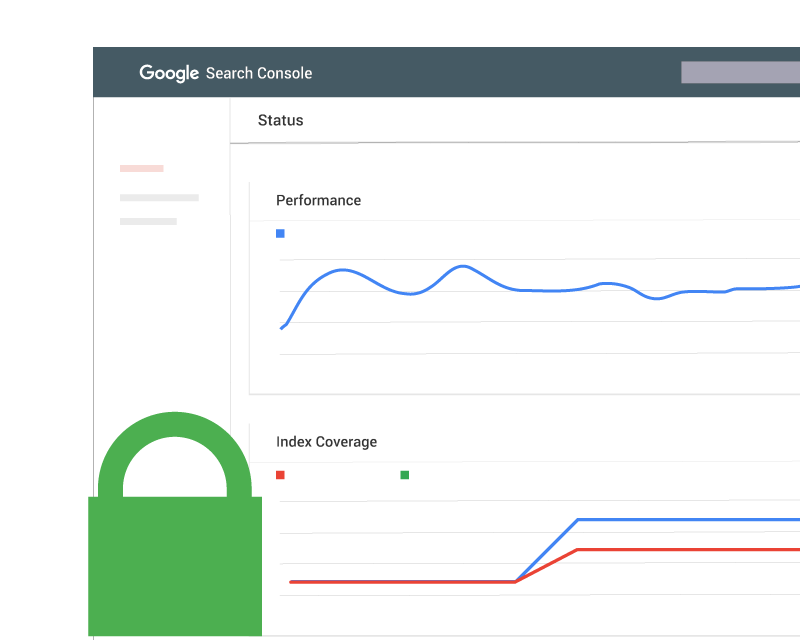
Successfully securing your company website isn’t just the physical actions you take to secure your site, it is also how users see your site and how Google reacts to your changes.
Keeping that in mind, a successful HTTPS migration means that you have made your site secure, your users are not seeing any warnings and Google has reacted well to it.
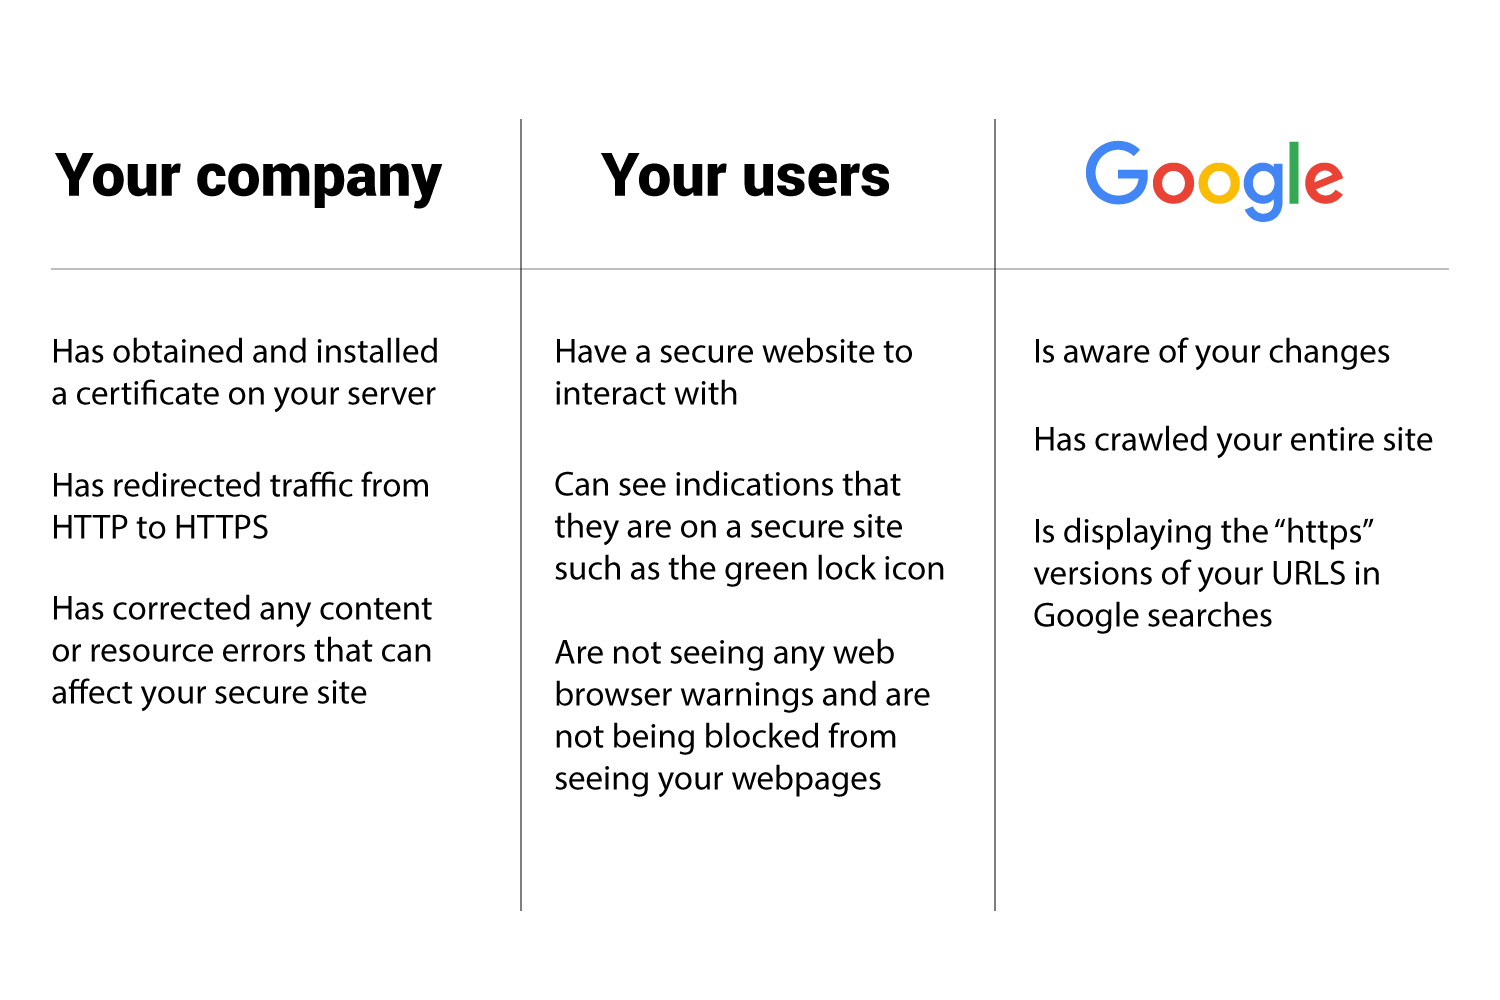
Here is what needs to happen for a site to be considered optimally secured:
Your Company
- Has obtained and installed a security certificate.
- Has redirected traffic from http to https.
- Has found and corrected any content errors that affect the security status of your webpages with browsers.
Your Users
- Have a secure website to interact with.
- Can see indications that the site is secure in their web browsers such as the green lock symbol.
- Are not seeing any warnings from web browsers and are not being blocked from any of your pages.
- Is aware of your changes.
- Has crawled your entire site.
- Is displaying the “https” versions of your urls in web searches.
So when we use the phrase “successful HTTPS migration” we are referring to the entire process.
The manner in which you secure your site will directly affect how your users see your site and how Google will react to it.
There are a number of issues that can happen after you try to secure your site that can affect your rankings and Google index presence. These issues may not be apparent until days or weeks after securing your web site.
How long does it take to secure your site and see results in Google?
- Two weeks to several months.
The steps required to technically make a website secure can happen in as little as an hour or so, but if your were to take those steps without first preparing your site it can harm the way users and Google see your site. When trying to understand how long it takes to “secure your site” one must understand that there are steps that you will take and there are steps Google will take.
The timeline of securing your website
There are two distinct timelines that are happening when you secure your site.
- Your actions
- Google actions
Most of the common mistakes that companies make can be avoided by understanding these timelines and how your actions affect them.
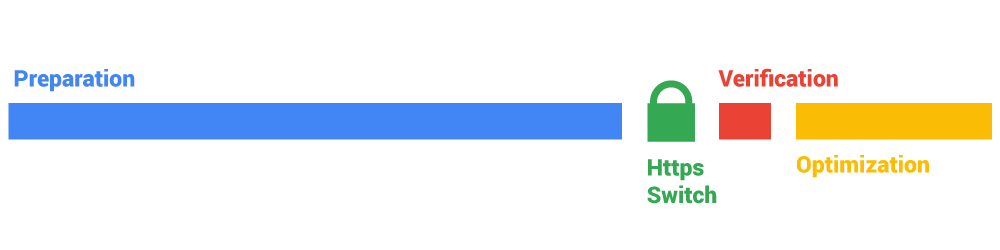
Your actions:
- Preparation
- HTTPS switch
- Verification
- Optimization
The length of time it takes you to prepare and migrate to HTTPS depends on several variables.
- The size of your site: A ten page website will be much easier to prepare than a million page website.
- If (or what type of) a CMS is being used: Content management systems such as WordPress are typically structred in a manner where many issues accross the entire site can be resolved rather quickly whereas if a site does not have a CMS (or has a less effective CMS) it can take much longer to make the manual changes required for an HTTPS migration.
- If your site is using Google webmaster console: A site taking advantage of Google webmaster console will have a head start on sites not using it. If a site does not currently use Google search console some lead time may be needed to set things up and have data start populating.
- The technical SEO state of your site: A website that has standard and unified linking policy, standard meta data policy and standard clean redirects will be quicker to prepare than a site which has not paid attention to technical SEO very much.
Google actions:
- Discovery
- Deep crawl
- Update index

The length of time it takes Google to react to your newly secure site depends on several variables.
- The size of your site: A ten page website will be go much faster than a million page website.
- The manner in which you implement HTTPS: A website that has properly informed Google about their changes using Google search console and sitemaps will go much faster than a website that has to wait for Google to individually discover each page on their own.
- If your site is using sitemaps: A site that has existing sitemaps will help Google crawl and understand your setup quicker than a site not using sitemaps (particularly for larger sites).
- How accessible your website is to Goolgebot: A website that does not restrict Goolgebot from seeing page resources and content will go much faster than a website that is blocking pages and resources.
The manner in which you prepare, verify and optimize your HTTPS switch will determine how long it will take Google to discover your changes, crawl your entire site and update the Google index.
Securing your website: The Process
The essential steps are:
- Assessing how Google currently understands your site
- Preparing your website
- Setup and testing
- Redirects
- Verifying
- Monitoring Google reactions
- Optimizing
1. Assessing how Google currently understands your site
Depending on how Google currently understands your site you may be ready to secure your site immediately. The truth however is that the vast majority of websites are going to want to look at some things and start correcting them prior to a switch to HTTPS.
The most ideal way to investigate how Google is seeing your website is using Google Search Console. Google Search Console will identify the issues it sees on your site. The trick is knowing what to look for.
We have created the Google Search Console Checklist for HTTPS and we definitely suggest you look at, but in a nutshell the following things should be addressed in Search Console:
- Ensure all URL versions are claimed – details
- Notate how Goolgebot is interacting with your site – details
- Ensure page resources are not blocked – details
- Ensure there are no issues or warnings in the robots.txt report – details
- Check if Google is suggesting HTML improvements
- Check the status of your sitemaps – details
Checking these things (and making corrections where necessary) will help you avoid some of the worse consequences that occur. It will also help ensure a speedy reindexing of your website in the Google search results.
I can not stress enough that Google will be reindexing every single webpage of your website as part of this process.
This is likely the only time you will ever experience this so you should make it count by making those small corrections you have been avoiding.
Doing this may add a week or even more to your timeline, but if you are depending on the money your website makes then it would be foolish not to address Google suggestions and warnings specific to your website.
2. Preparing your website
Web hosting info
To prepare your website make sure you know the basics of your website which include:
- Your hosting company (Rackspace, Bluehost, etc.)
- Your web server software (Apache, NGINX, etc.)
- Your CMS (WordPress, Ghost, etc.)
The web host you use, the web server software your site is running on and your CMS (content management system) will determine your options and the process you will need to follow in order to secure your site.
Whether you are hiring someone to help or just looking for tutorial online, knowing these basics will make things easier.
As an example, you will find better information online if you search for “How to secure my NGINX WordPress site hosted on Bluehost” than you will if you only search for “How to secure my site”.
Mixed Content
The main task required to prepare a site for HTTPS is to ensure there will be no mixed content.
If mixed content is found on your web pages then browsers will show warnings or indications to your website visitors that the page is not secure.
Mixed content can be defined as “content on an otherwise secured webpage that is not being called from a secure source”. If you have any mixed content on a page, that page will not be secure. If you have mixed content throughout your site (like in your sidebar), then your entire website will not be secure.
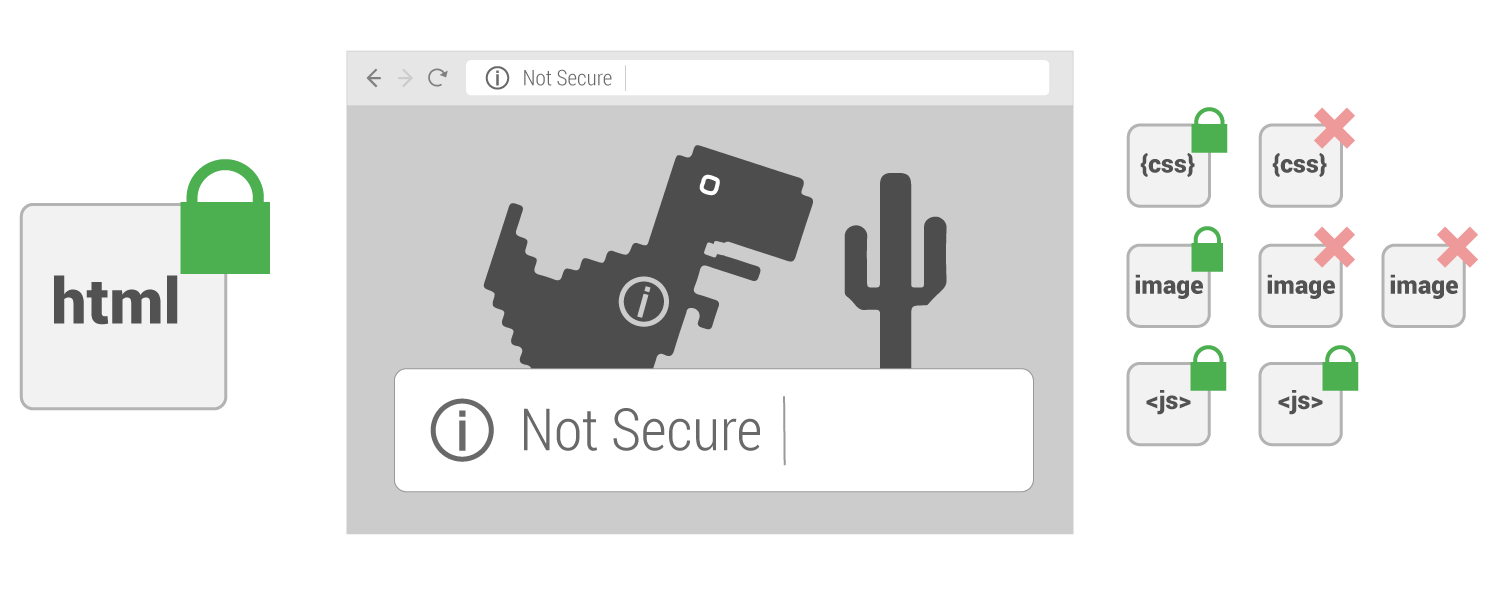
In the above image we see that one css file and two images are being called from a not secure source. In this scenario we would need move that CSS file and those two images to a secure source. If we don’t our webpage won’t be secure, our users will experience browser warnings and Google will not consider that page secure.
Common mixed content areas to watch out for are images and page resources such as CSS and Javascript.
There are two main reasons why you will find mixed content on your webpages.
- The resource you are calling is located on an unsecure website or server.
- The resource you are calling is available on both HTTP and HTTPS but the code you are using is calling the resource using the HTTP version
If a resource used by your website is only available via HTTP then that resource must be moved to a secure source or removed from your page.
If the resource is available via HTTP and HTTPS then you can simply change the way you are calling it from your site.
Essentially every call to a page resource across your entire site must use “https://” instead of “https://”.
If that seems like a great deal of work, you are right. It will require someone who is familiar with how your website is using resources.
Are there any shortcuts?
There is a way that can help you through this in most cases on most browsers. It is called “Upgrade Insecure Requests”.
It is an instruction you can include that tells browsers to only load page resources from secure sources. To learn more see our article that explores the Upgrade insecure requests header.
Setup and Testing of security certificate
Setting up your web server to use HTTPS is different for different hosts and servers. All setups share the basic steps of:
- Choosing and obtaining a security certificate (often referred to as a “SSL certificate”)
- Installing the certificate
- Testing
Choosing and obtaining a security certificate
Security certificates can be free or paid. Either are fine as long as the certificates are trusted by web browsers (Chrome, Firefox, etc.) and the process is roughly similar for most.
The first thing to decide when choosing a certificate is the certificate validation level. Each of the three following options will work to secure your site when used properly.
- Domain Validation: This verifies that the user of the certificate has control of a domain.
- Organization Validation: This verifies that the user of the certificate has control of a domain and the basic organization (business) information is correct as stated on certificate.
- Extended Validation: This verifies that the user of the certificate has control of a domain, organization info, physical location and that the organization legally exists.
Time is a factor to consider when choosing validation level. Organizational and Extended Validation may require significant time to acquire properly. It is a very safe bet to start with Domain validation first as these certificates can be used as soon as purchased. This will help your development team have the ability to setup up and test things prior to going live without delays.
The next thing to decide is the scope of your certificate. The scope refers to how many domains or subdomains need to be secured.
- Single name certificates: A business using only one domain name can use this (this is the most common type used). It covers one domain name (example.com) but does not cover subdomains other than www
- Wildcard certificates: A business using one domain name that also uses subdomains will need this type of security certificate (example.com, locations.example.com, payments.example.com, login.example.com).
- Unified / Multi domain certificates (SAN): Some businesses have several different domain names due to brands, locations or languages. This certificate would allow one business to maintain a list of verified domains rather than have individual certificates for each website. (example.com, example.org, example.co.uk, otherexample.com)
Dedicated IP Address or not
Modern certificates do not require a dedicated IP Address as needed in the past, but if your business or company has a great deal of users who tend to use older devices, it may be wise to use a dedicated IP Address as this will allow older systems and browsers to still make secure connections.
Installing the certificate
The process to install security certificates will vary depending on several factors (host, web server software, etc.) A certificate should be installed professionally by the team who maintains the server. If you are doing this on your own, the process is fairly straight forward but can be intimidating:
- Generate certificate signing request (CSR)
- Request the actual certificate
- Install certificate on server
Testing the certificate
Ensuring the certificate and the installation went well is actually quite simple.
Test certificate functionality
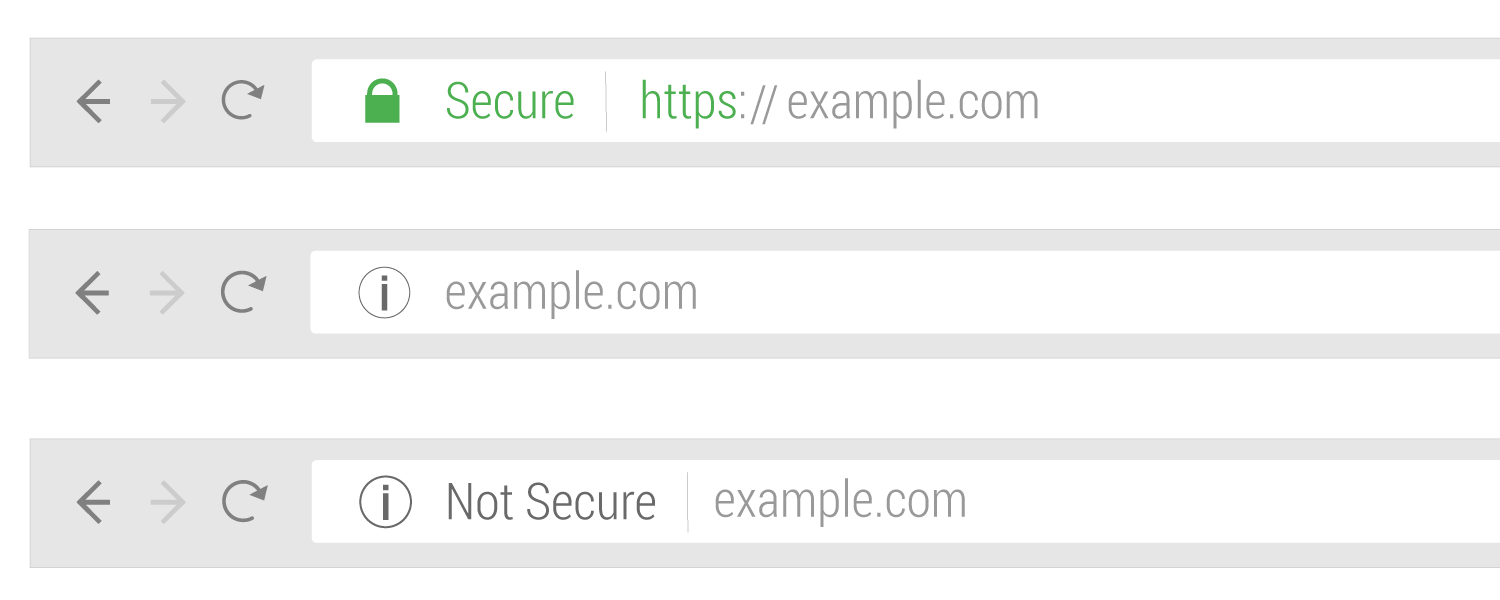
Once a certificate is installed correctly you should be able to go to one of your webpages and reach it using “https://” and “https://”. If your webpage is example.com, you should be able to navigate to “https://example.com” in a web browser and the address should work. The web browser should show an indication such as a green lock that signifies the webpage is secure. It should not give any warnings such as “not secure”.
If this works, that is great! It does not however mean your website is now secure. It only means that your website now has the potential to be secure.
Test certificate compatibility and strength
Just because you can see your pages error free does not mean you are in the clear. Test your certificate for all types of scenarios and situations can be accomplished using the Qualsys tool which is a free testing tool of your certificate / server settings that scores your solution (try to get an A+).
This tool tests many things and provides a great deal of feedback. The tool will actually connect to your webpage using many different software and browser combinations and will list out if there are issues connecting from any certain setup.
This information is valuable and useful. Ican allow you to be confident that your certificate is set up properly or it can tip you off to where it isn’t working so you can solve issue prior to going live.
Development access
There are some scenarios and setups where it may not be this simple to just install the certificate and test. The main thing to be aware of is that you should absolutely be able to be able to access the https versions of your pages so they can be tested prior to the final redirects going live.
The dev team or whoever takes care or your server will know about this hopefully. Just in case the question to ask is this…
“How can we test the certificate live prior to redirecting traffic?”
The answer to that question will be either:
- We will be able to test it live using our current setup
- We will need to setup up a development server to test it
Sometimes there will be complications that will require a development server to test the setup and these situations usually involve one or both of our two next subjects, redirects and caching.
4. Redirects
A redirect moves a visitor from one page to another page. When the first page is visited, the redirects tells whatever is visiting that there is a new page to go to.
In the case of securing a website the redirect will go from the “https://” version of a page to the “https://” version of the page.
After the security certificate is installed your website is likely available using both “http” and https” but the version that Google knows about is the “https” version. This means all your Google traffic is being directed to the current addresses.
To make your website secure we will need to tell Google and whoever else visits your webpage that they should use the secure version. This is accomplished with redirects.
Where are redirects setup?
Redirects are created most of the time at the configuration file of the the web server software. Here are some common web servers and where redirects can beaccomplished on each:
- Apache – config file or .htaccess file
- NGINX – config file server block entry
- Litespeed – config file, .htaccess file or admin panel
What redirects should be used?
Ideally all traffic should be redirected from the insecure “http” addresses to the secure “https” addresses. Often this is accomplished with one redirect instruction.
The instruction basically says “all traffic to http should go to the secure versions of the page”.
301 redirect
The final redirect should be a 301 redirect. This is known as a “permanent redirect” and will be important for Google and how your pages are indexed in Google results.
Here are examples of general 301 redirect codes for redirecting http pages to use https…
Apache / .htaccess
RewriteCond %{HTTPS} off
RewriteRule ^(.*)$ https://%{HTTP_HOST}%{REQUEST_URI} [L,R=301]
NGINX
listen 80;
server_name domain.com www.domain.com;
return 301 https://domain.com$request_uri;
}
Since there are many different server setups and variations, the above lines of code may not be appropriate for your situation. It is only an example of how a redirect can be accomplished site wide with one small set of code.
Once your redirects are live your site will be secure
Your site is considered “secure” when these three things are true:
- Your server is capable of serving secure traffic (https addresses)
- Your web traffic is being redirected to those secure addresses
- The resources on those pages are called from a secure source (no mixed content)
The combination of having an installed, functioning security certificate and redirects setup directing traffic to secure addresses are essentially the steps required to make your site secure. Ensuring there is no mixed content on any pages completes the process.
5. Verifying
Verifying that the https versions of your pages, when live are indeed being reported as secure by browsers is not a step to forget. Even after a carefully planned and executed migration, things like mixed content still occurs and any time you spend looking through your site to find issues is time well spent.
One of the big issues we have run across has been caching issues which can really mess up what you think will happen when you “flip the switch” (make your redirects go live).
Caching
In WordPress and other content management systems there is often a caching solution involved. Caching of pages works like a charm for website performance but it can cause some issues during the time when you are making your redirects live.
If your website is using a caching system, it is important to know the process to “clear the cache”.
Sometimes a caching solution will also be caching redirect instructions and if those caches are not cleared you may find unexpected behaviors that will affect you and likely confound you.
When experimenting with your cache, it is highly advised that you look at the http headers via a tool or testing environment and test some pages out. Make sure that the redirects you are seeing are the ones you want, not previous versions of them.
This will be an important step to ensure all your redirects are being seen by Goolgebot in the manner that you want them to be seem (in almost all situations the redirects would be 301 redirects from http to https version of page).
The Switch
When redirects are live the traffic to your website will be redirected to the secure (https) version of your pages and your website is now secure.
At this point you have now completed the technical steps required for securing your website but important issues for SEO are yet to come.
6. Monitoring Google reactions
Google actions
Now is the part where Google begins to react to your changes. This includes:
- Discovery
- Deep crawl
- Indexing
Google discovery
Goolgebot is the web crawler used by Google to discover pages across the web. Goolgebot doesn’t just discover new pages, it also detects changes in webpages that it already knows about.
After your redirects go live and Goolgebot crawls one of those redirected pages, it will discover the redirects, follow the redirects and then report back to the index what it has found.
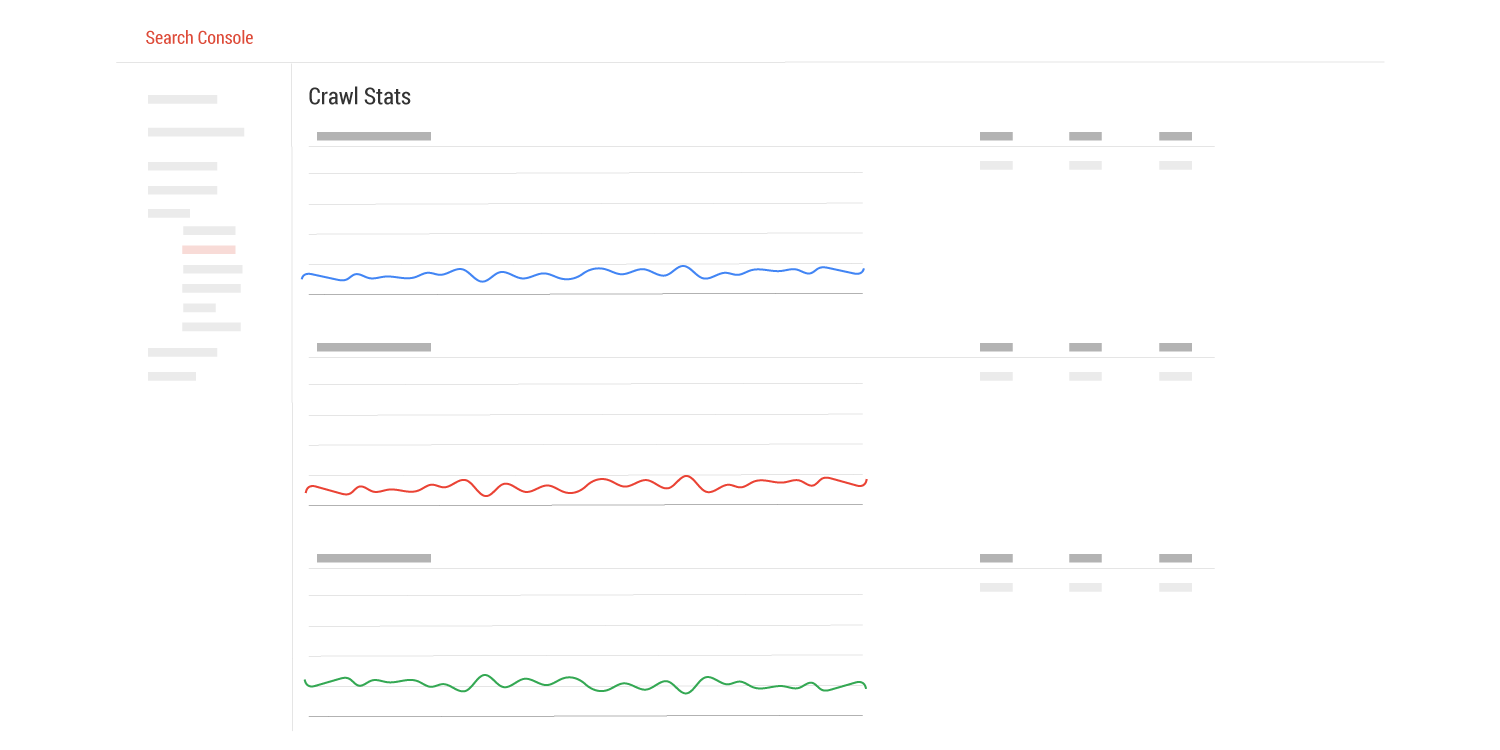
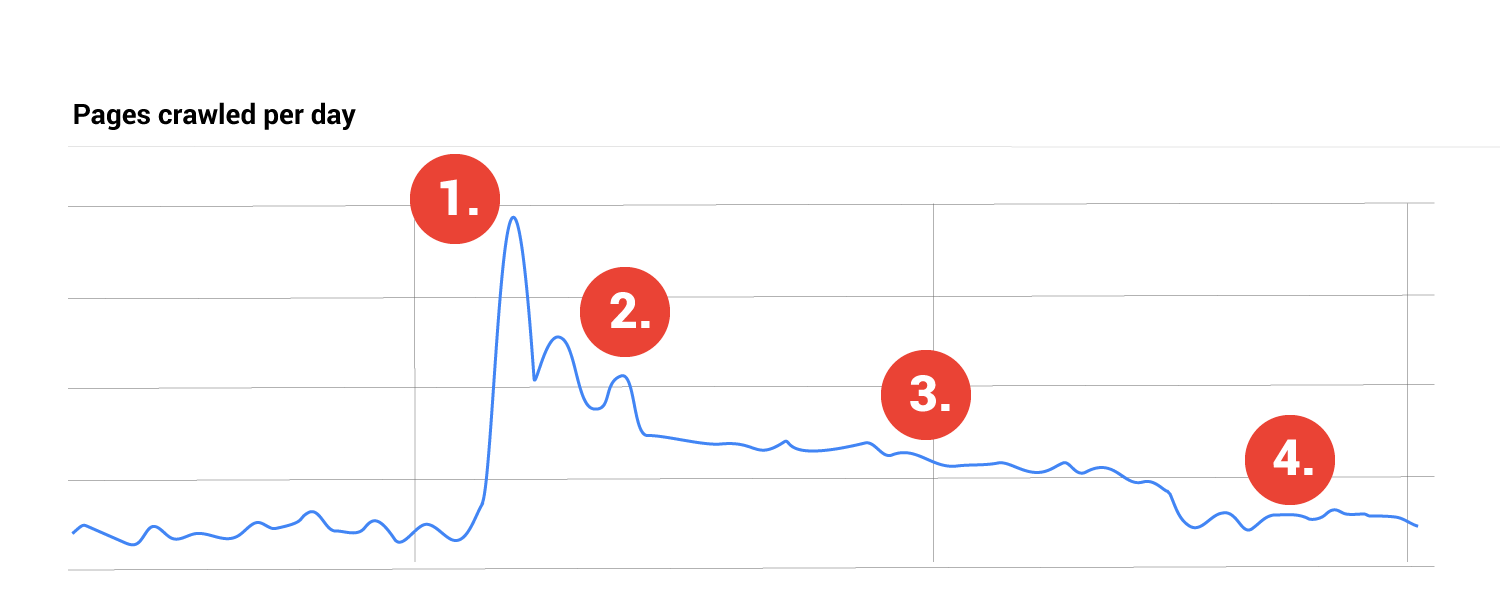
This actually begins a great deal of activity. When Goolgebot discovers several of your pages are changed it will start to heavily crawl your site. This can actually be monitored by looking at the Crawl Stats report in Google search console.
As Google discovers more and more pages it will crawl your pages over and over resulting in high spikes of activity.
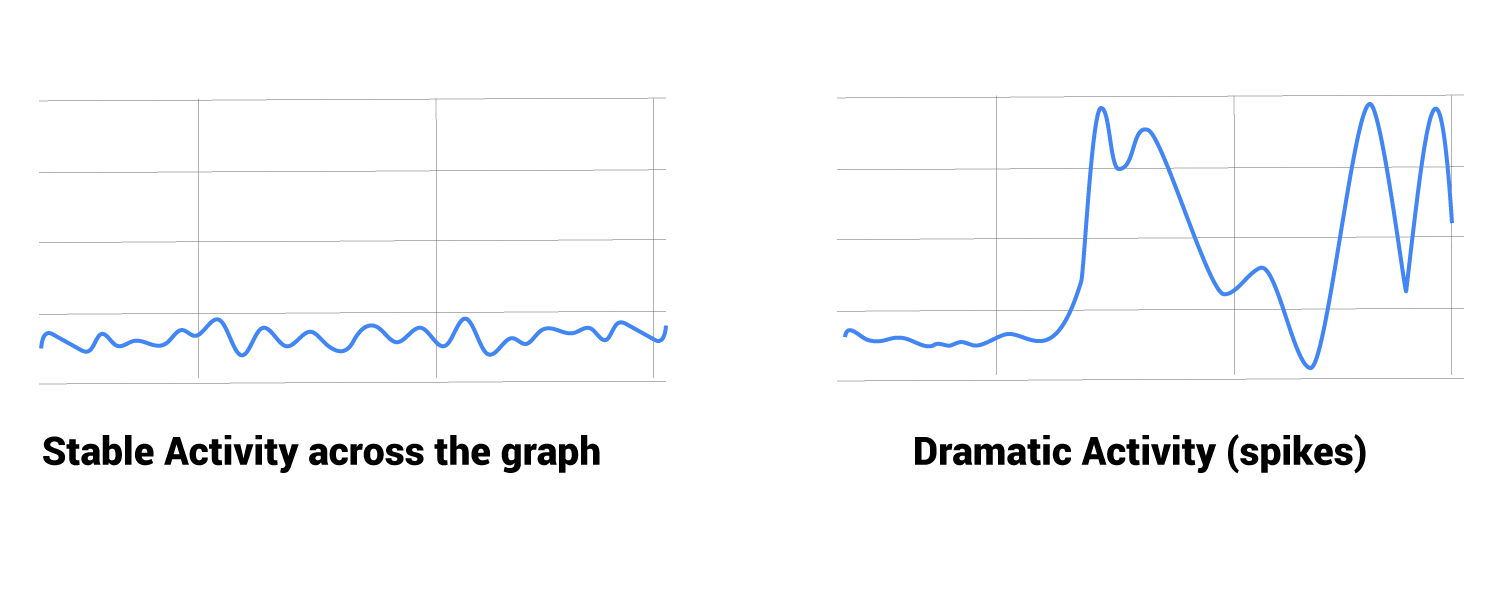
Goolgebot Deep Crawl
As Goolgebot starts heavily crawling your website you can expect to see a few days of high activity and then (hopefully) a gradual decline in activity which in a nutshell means that Google has:
- Seen the changes (discovery)
- Explored the changes (deep crawl)
- Is now finding less and less undiscovered changes
- Is back to normal activity
This is good. Because the speed in which you will begin seeing your “https” urls in Google search results will begin in happening now.
Google indexation
The Google index is what populates the Google search results. When you think of a Google search results page, what you see is a list of titles, descriptions and urls of webpages Google thinks are relevant to your search.
The final stage of a successful HTTPS migration from a SEO standpoint is to have the urls in the Google search results reflect that your pages are secure. The indication of this is simply that the urls in the Google search results are using “https://” rather than “https://”.
Even after you have prepared your site, made the redirects live and Goolgebot has crawled your site you will not immediately see your secure urls in search results, in fact most sites will wait weeks to see this.
Long story short, there will be no SEO or ranking benefits until you see those secure search results on Google.
The preparations you took throughout the process of making your site secure directly affect how long it will take for you to see the Google indexation of your secure urls.
The difference between success and failure here can be months of wait time for this to occur.
7. Optimization
Once Google has reacted to your newly secure website, issues can be discovered that indicate our solution can be improved. Most things can be planned for, but some only become obvious after the change.
This guide will briefly touch on the following optimizations:
- Performance
- Redirects
- Web Server
- HSTS
Performance (how fast your webpages load)
Making your site secure does add tasks and time to what your web server is doing in order to display your webpages.
In most cases these additional tasks do not affect performance much, but there is a really good way to know if your server is having issues. In the Google search console Crawl Stats report that we mentioned above there are three aspects of crawling reported using three different graphs. The last graph on the report (with a green line) represents how much time it takes Goolgebot to retrieve your pages.
The image below illustrates what it looks like if you have an issue.
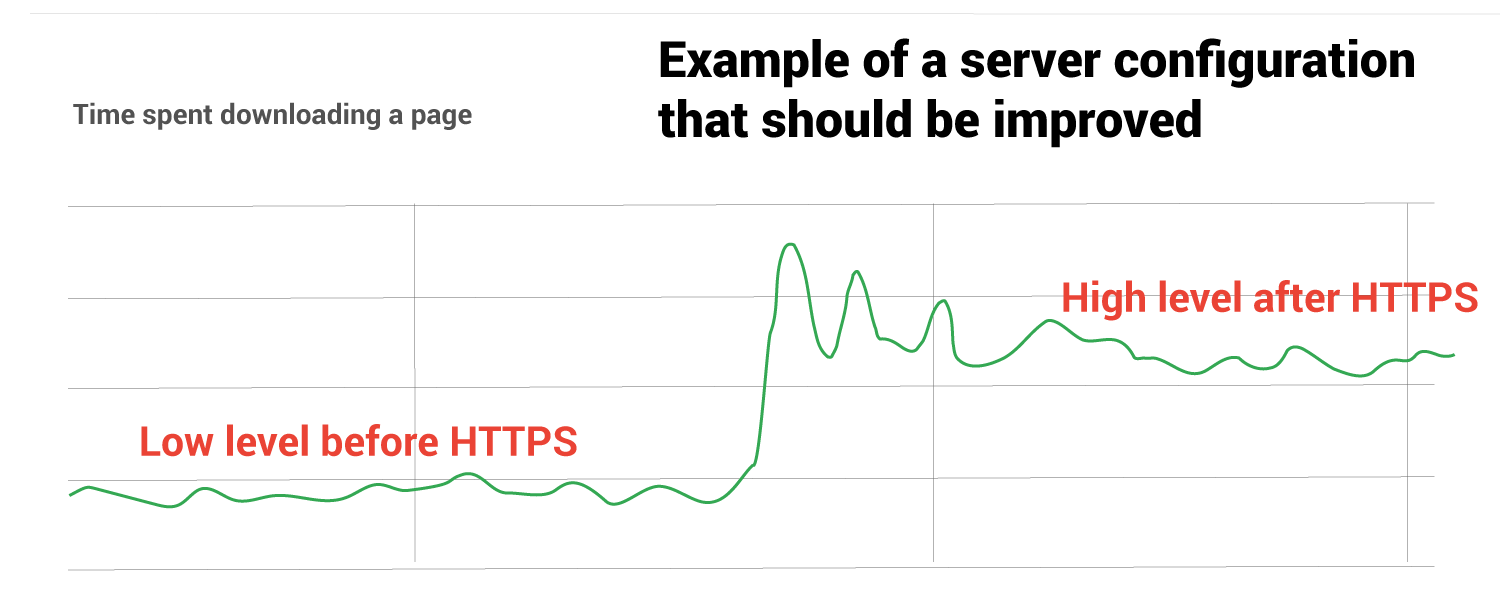
If you followed our Search Console Checklist for HTTPS then you have a nice record to look at and compare with what is represented after your HTTPS switch.
If you are experiencing performance issues then you may need a stronger hosting package or your webs server may need some updates and tweaks (see web server below).
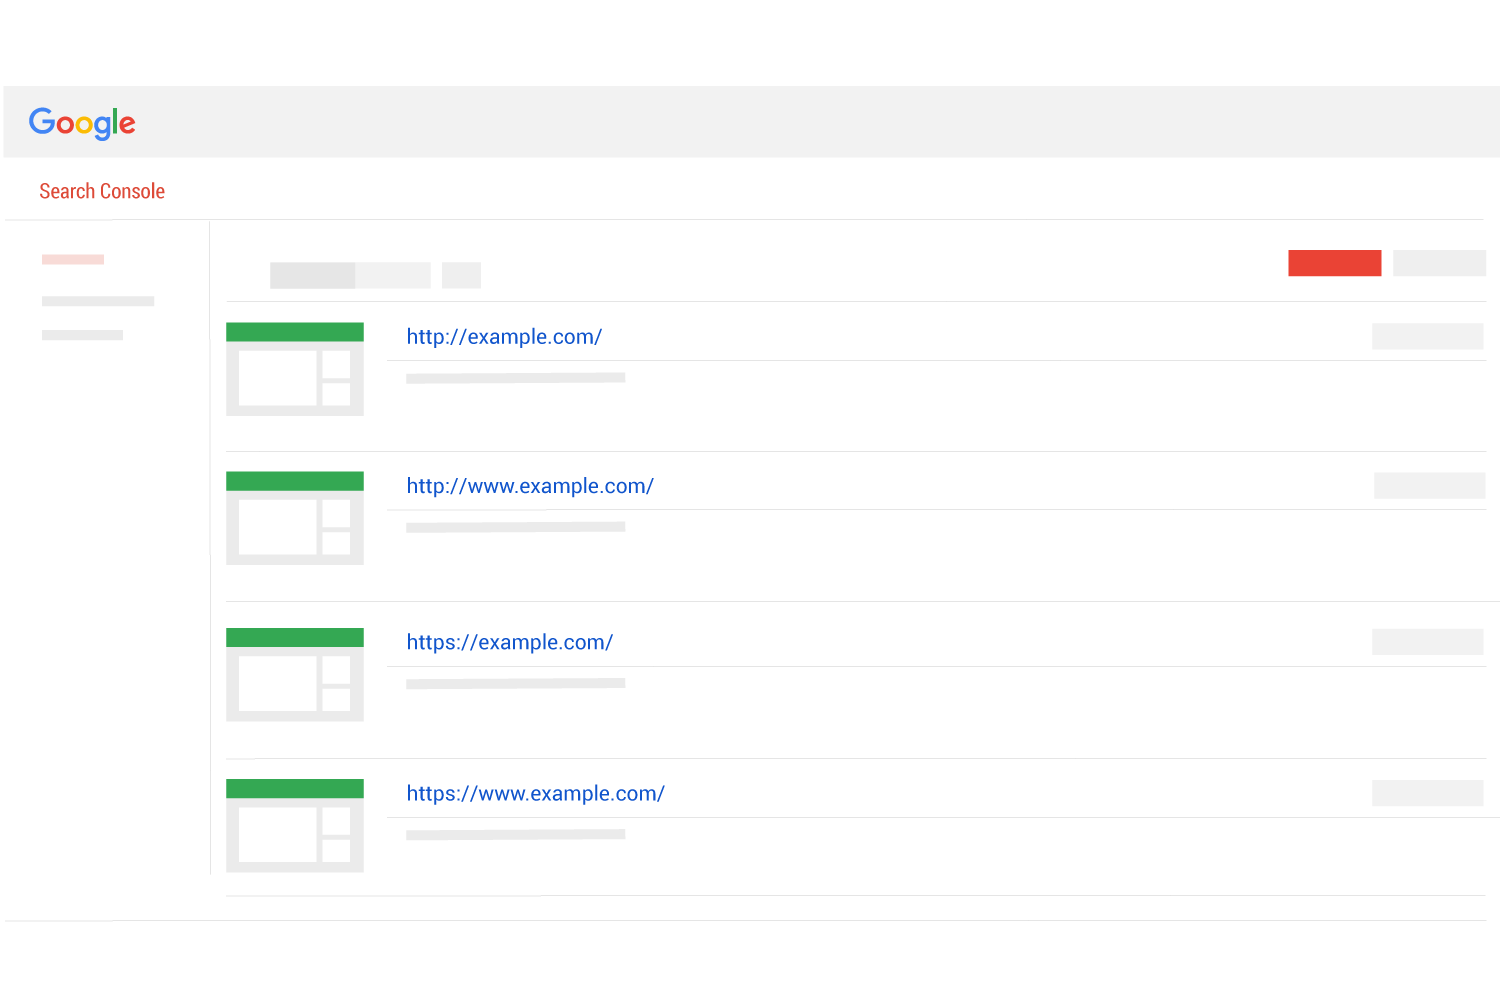
Redirect chains
One of the more common issues companies discover after a HTTPS migration is strange redirect chains. A redirect chain is essentially an webpage that gets redirected more than once unnecessarily.
Example: A visitor goes to https://example.com but is then redirected to https://www.example.com but that page is redirected to https://example.com which is very unfortunately then redirected to https://www.example.com and even though these redirects are happening in a blink of the eye they can have negative performance, indexation and SEO implications.
Ensuring such redirect chains are not occurring on your webpages is highly recommended.
Web Server
Your web server software and the settings that are used for that software may affect the performance of your web site. In most cases the team supporting your web server will have thing setup well, but just in case…
- Make sure your software is updated
- Make sure you have wisely chosen what cipher suites are being used
Server software updating
Your web server software should be updated regularly and is hopefully using the most current update available. Web servers like Apache, NGINX and Litespeed are almost constantly making improvements and many of those improvements will affect how HTTPS is dealt with by that server.
Cipher Suite usage
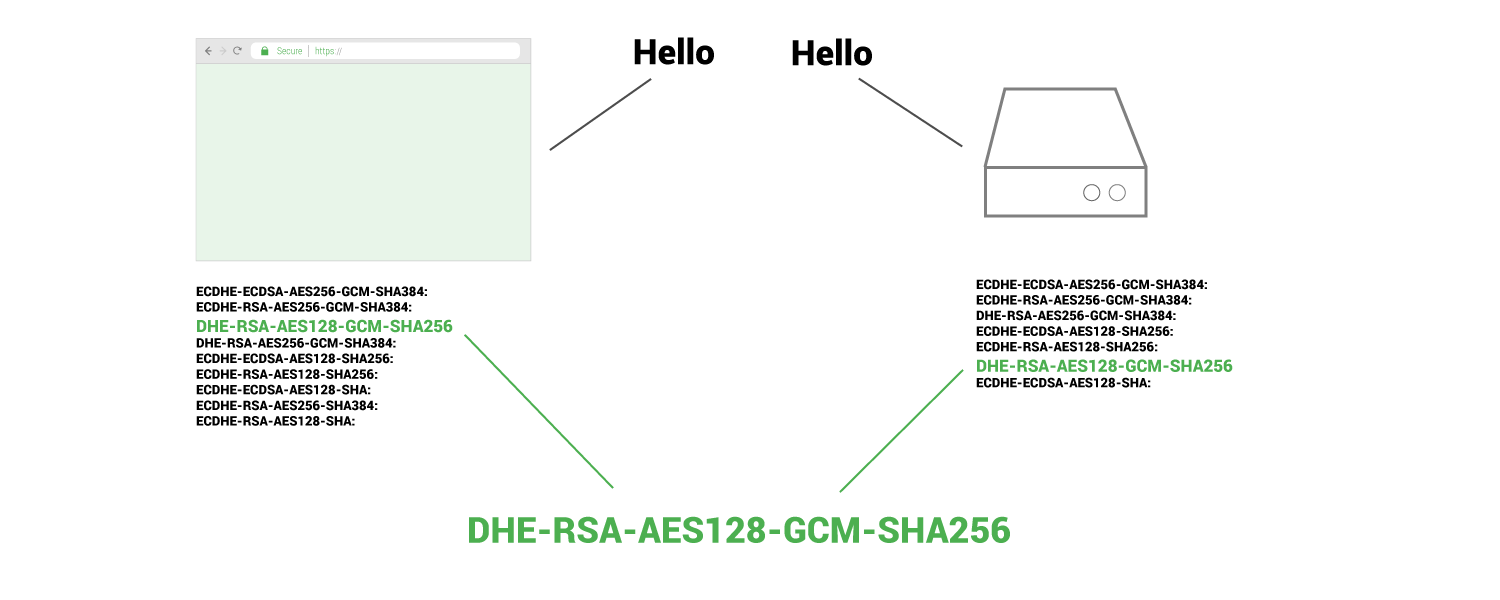
Cipher suites are an important part of the interaction between the web browser and your web server.
The cipher suites your web server uses can be edited by whoever maintains your server. If they are not, default cipher suites will be used by the server. In some cases the default cipher suites are not ideal at all for various reasons. In some cases the default cipher suites can actually decrease the level of security of your traffic.
Cipher suites are not a well known subject and they take a bit of explaining. To learn more about cipher suites and how to optimize them please read our article here.
Improve security with HSTS
HSTS stands for “HTTP Strict Transport Security”. HSTS is a way to inform browsers that your web pages should only be accessed using HTTPS.
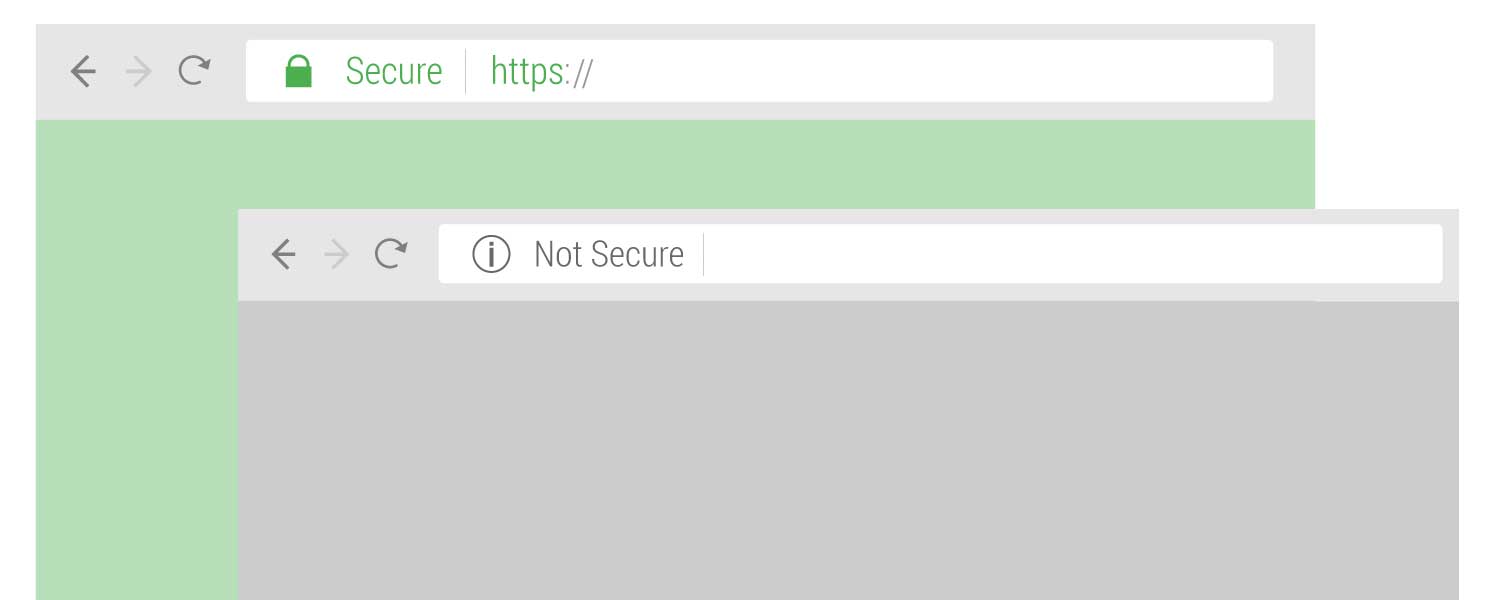
The reason that this is important can be illustrated by a common example of old links. Before your website was secure, you had links around the web that pointed to your web pages. Those links were using “https://” and therefore when a user clicks one of those links web browsers will go to that insecure URL, then follow the redirect to the secure page.
The above example illustrates two problems, the first issue is security and the second issue is performance.
Security
To get to your secure pages a user has to access a insecure redirect page (to see the redirect) before they get to the secure page.
Performance
A redirect adds time to a page load, a page that has to redirect takes longer to load than a page with no redirects.
HSTS solves both issues
By properly setting up HSTS you can avoid these issues. It essentially will remove the redirect from the equation because you have explicitly instructed the browser to never access your domain using “HTTP”. That means that in the above situation of an old link, web browsers would never access the “https://” version of the page to see the redirect. It will instead just go straight to the “https://” version of the url without needing a redirect to tell it to do so.
Implementing HSTS
There are two general steps required to reap the rewards of HSTS fully.
- Adding the HSTS header (Strict-Transport-Security)
- Adding your domain to the preload list
The first step is adding the header. The header looks like this:
The header states the amount of time the instruction is valid for at least a year (max-age=63072000) and that both the domain and any subdomains are to be preloaded.
The second step is to test and submit your domain to the HSTS preload list which is used by all major browsers.
The preload list page is here. The details your dev team needs to implement this wisely can be found on that page as well.
Use of security headers
We just mentioned HSTS above which one example of a security heading (Strict-Transport-Security). There are several more to choose from.
- Content-Security-Policy
Protects sites from XSS attacks. By whitelisting sources of approved content, you can prevent the browser from loading malicious things. - X-XSS-Protection
Configures cross site scripting. - X-Frame-Options
Defends against clickjacking by not allowing your webpages to be “framed” or used on other domains. - Referrer-Policy
Referrer Policy allows a site to control how much information the browser includes in terms of tracking. - X-Content-Type-Options
Stops a browser from attempting to MIME-sniff the content.